Soft box
 This tent-like structure fits over the flash head. The materials used for the sides is generally silvered on the inside, so that all the light is reflected forwards. At the front is a large, rectangular piece of white diffusing material, which softens the light. The larger the soft box the wider the spread of the light. Many professional photographers use light boxes simply because there is nothing like a soft box when it comes to providing soft light for any kind of styles of photography such as food, fashion, product or even portraiture. Soft boxes play an important role for fill, separation and edge lighting. All of the photographers can't imagine photography without soft boxes.
I have chosen these two photos as an example because I think they represent soft box very well. Soft box makes me think of nice and warm pictures, creating a soft texture, therefore I think mum and a baby are two perfect examples of soft box.
Beauty dish
Beauty dish is a lighting device that use reflector to distribute light toward a focal point. The light created in between of the flash and soft box,giving the image contrasted look, which adds more dramatic effect to our photos. Most of them have white painted inside of them to soften the light. Nearly all professional photographers use beauty dish only for portraits.
I have chosen these photos as an example of beauty dish because I really think it worked really well on these portraits. The model's poses are simple, but very effective because of their face expressions. Their faces look really natural and pretty because of the beauty dish.
Standard reflector dish
This standard lighting accessory is usually provided with the flash head. The bowl shaped metal reflector, stops light from spreading over too large an area, while bouncing back, points the light to the direction of the subject. The results will still be quite strong, providing a harsh shadow. In this case the size plays a big role, because the bigger the reflector the softer light we get.
These two photos are my favourite reflector photos that I could fins as an example. On the first photo we can see really nice shadows created by reflector. Whereas on the second picture we can see a really good example of the light, lighting directly on to the model with hash light.


My photography for standard reflector dish

This is my first group photo from studio, using standard reflector dish. This is not one of my favourite the of light to use in the studio as it creates some shadows which are not really interesting in group photos, but I think it might look a lot better on portrait photography. I think the shadows on portraits would be a lot more interesting that this one, on this photo. I have put my models from the lowest to the tallest, the lowest one being the closest to the reflector which was on the left side. I did this to make sure that no one has a shadow on their face. Because if the tallest person would be at the front then the rest of them would have a shadow on their faces. By posing them like this it also makes the photo look neat and nice. I have also left a bit of space at the top as well as the bottom while framing it, but I had to leave only a little bit at the sides as if I would leave more then we would be able to see the outside of the white background.
Snoot
Snoot is mainly used for creating a dramatic bright light. Snoot is a tube which allows to throw the light without any spread. When using snoot, a spot of bright light is created, which is round or oval shape, depending on the angle of the light. It can create really beautiful shadows on our models face. There are also different coloured filers that you can put them onto the snoot light and create some nice portraits.
I really like these two examples of snoot. The first photo show us how we can use a snoot with filter to create nice colours for example on hair or face of our model which nicely spreads out. The second photo clearly represents the mystery feeling of the photo and how the snoot is used to light into one direction.
My photography with snoot

This is my first group photo from studio, using snoot lighting. First of all, even though the background of the photo is really dark, we can see that there is a darker part of it on the right hand side as I wasn't able to fit all of the models in the studio background and that's why it created the big jump from light to bright. It was very hard to see through the camera because it was really dark in the studio, but I have managed to frame the photo quite well, I left enough space at the top and a little bit at the sides not to cut anyone out of the photo. I have placed the models to make sure that no one is in front of anyone and we don't have unwanted shadows on anyone's face. We can see that the light was coming from the left hand side, as Molly's face (girl on the left) is really bright, where as we move along to left hand side the light is fading on each person's face, except Lewis (on the left) who was standing behind Molly, that's why he's face is not as bright as Molly's but he still got some light reflecting on him as well.

This is my second group photo from studio, also using snoot lighting. In this photo the same thing happened with the background as in the first photo, but If I would move Umar a little bit closer to Dymitra (two models on the left) I might have been able to fit them all in the studio background drop. In this photo Dymitra and Saif got the best light reflection on them as they were bothy standing in the right place (in the middle). We can see that Molly is standing too near to the light that's why her face is really bright, where as Lewis and Umar are too far away and they have only a little bit of the light on their faces.
Reflector
When using a reflector in portraits, the reflector will bounce the light onto the model and this will give you and instant beautiful result every time. Reflector are used to remove the shadows from models face (main feature that we focus on when we take the photo). The reflector open up the shadows an allow the light to shine on to the models face. The white reflector give us an effect of natural look of the face, where as the silver reflector makes the model stand out to the viewer because of the bold glow of the reflector. We can find them in different sizes, which is very useful, because sometimes we might need a small one for still life photography and sometimes we might be needing a bigger one.
I really like this photo as an example of using the reflector in our photo. By using a reflector in this photo the girls face look really really soft as well as natural. The reflector also made her eyes stand out very well, and gave a beautiful shine in her blue eyes.
Soft light
Soft light is completely different from hard light. Soft light makes the image a lot warmer than the hard light as well as softer in colours. The best thing about soft light is that it tend to curl around the subject we are photographing. It also seems to cast shadows with soft, not hard edges around the subject we're photographing. Another thing about the soft light in studio is that the closer the subject is to the light the softer the light will be curling around the subject. The soft light also makes people look beautiful as well as younger. This makes the image to look more pleasant to look at, due to the great skin texture which looks really soft. This light is really good to use for modelling photos in a fashion magazine.
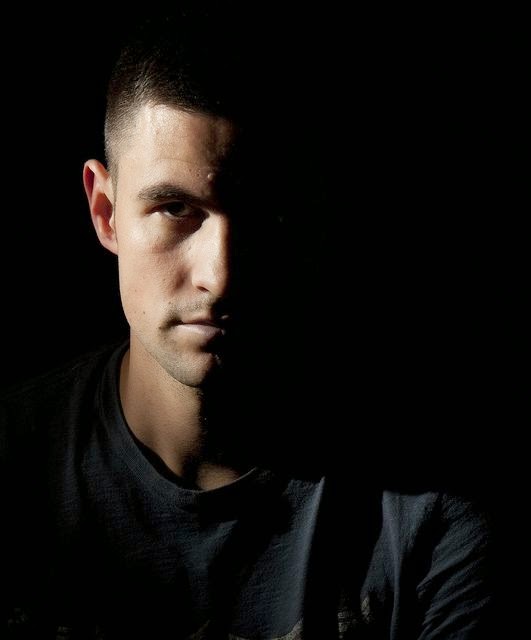
Hard light
Hard light is a technique that makes our model who is being photographed more vibrant and more eye opening while viewing the image. Hard light photos always have a lot of depth of field in the image, so that the only thing that catches your attention is the model who we're focusing on.Hard light mainly produce fine lined shadows from a single light source, which is mainly the sun in outdoor location, because of the natural brightness, but it can also be used in a studio, with flash lights.


.jpg)