Five day lunch photography
Friday, 10th of October

This is my first lunch within the five day lunch photography. I think the composition of this photo is right. I have used natural light coming from a window behind me, you can see a little bit of reflection in a bottle because it was a glass bottle but I don't think it affects the photo that much. I have used manual settings, but automatic focus, therefore I think that's the reason why the plate in a little it out of focus. From this photo I have leant that I should start using manual focus, to be more specific.

This is my second photo of lunch. I have decided to do diptych this time, as after my research I have realised that a lot of photographers do food diptychs and most of them look really interesting. I wanted to show what I ate and what I drank separately. I have also used natural light coming through the window. I like the composition of the photos. Even though I have cut a little bit of toaster from the first photo, it is straight and it doesn't really affect the photo so much, but I think I have cut too much of the bottom of the glass from the second photo. Overall I think that the two photos match well together as a diptych in terms of subjects and harmonising colours.

This is my third lunch. I have also used natural light, coming from big window. The composition isn't that right, because I should have just leave a little bit more of space at the bottom of a photo. I have made the same mistake as in taking the first photo and I have used automatic focus and the straw in the drink is out of focus which in my opinion affects the photo because everything else is in focus.

This is my contact sheet for five day lunch photography:
Saturday, 11th of October
This is my second photo of lunch. I have decided to do diptych this time, as after my research I have realised that a lot of photographers do food diptychs and most of them look really interesting. I wanted to show what I ate and what I drank separately. I have also used natural light coming through the window. I like the composition of the photos. Even though I have cut a little bit of toaster from the first photo, it is straight and it doesn't really affect the photo so much, but I think I have cut too much of the bottom of the glass from the second photo. Overall I think that the two photos match well together as a diptych in terms of subjects and harmonising colours.
Sunday, 12th of October
Monday, 13th of October
In this photo I have used natural light. The composition is not very bad, because I have placed them in the middle. I didn't really look at the background and foreground which made this photo look a little bit messy, because of the shadows and poster on my wall in the background. I think taking this photo from an eye level angle would be more effective than it is now.
Tuesday, 14th of October

In this photo I have decided to photograph my lunch half way through. It was nearly eaten. I don't like the composition because it's not straight and it makes it look really messy, but I was taking this photo in rush that's why I didn't think about the composition or the style of the photo. The light that I have used was artificial, which makes it look even worse, because you can also see the reflection of the lights in the plate. I think this is one of my worst photos, but now I know that I can't take photos while I'm in rush and really need to think about them before I take them.
This is my contact sheet for five day lunch photography:

Technical Wednesday, day one - metering mode
Metering mode. In photography, metering mode refers to the way the camera determinate the exposure. These are the three types of metering that I have used:- Spot metering
- Center weighted metering
- Matrix metering
Spot metering - with spot metering, the camera will only measure a very small area of the frame, which is very useful, in my opinion, in food photography when we want to photograph one object, for example a fruit. This will usually be in the center of the frame. Spot metering is very accurate and is not influenced by other areas in the frame.
Center weighted metering - in this system, the metering concentrates of about 70% of sensitivity from the center of the frame. The balanced in then feathered out towards the edges.
Matrix metering - in this mode the camera measures the light intensity in several points in the frame and then combines the results to find the settings for the best exposure. This is really helpful if we want to concentrate on the full image rather than just one aspect of it.
These are some of my photos, all in order (spot, center, matrix) using three different metering modes and comparing them together to see the difference.
Day light

These are the first set of photos that I have done, using five different coloured sweets. I have placed them one next to each other, slightly tiled to one side, because i didn't want to place them straight because then it would look a bit boring and by composing them like this I was trying to make this image a little bit more interesting. I have used natural light coming through the big windows, but I have placed a pink transparent paper with a nice texture to give my photo a little bit of pink light, also creating a nice textured pink background for my photo, which I think matches well with the foreground. Personally, I can not really see the difference regarding the metering between these three photos. It might be because they are very small differences, because I have definitely changed the metering modes while taking these photos and I have also checked in Photoshop after, to see which one is which.

This is second selection of three photos, taken in three different metering modes. This time I have decided to use a green apple, and spray some water on it to create nice little water drops. I have used natural light, coming through a window, which also gave me a nice shadow of an apple in front of it. I haven't used a tripod for this photos either, but if you enlarge them you can see a little difference between them. I think the spot metering worked perfectly for these photos, because I only wanted to concentrate on the main subject which is the apple.

These three photos have been taken on transparent piece of paper in three different types of metering mode. I have used chewing gum pack in these photos. Underneath the transparent paper I have put sweets pack and I think it looks more interesting, because it shows through the transparent paper. One of the things that I didn't realise while taking is that the artificial light was on and that's why you can see that the transparent paper is yellow, because of the light that was on in a room. Because of this mistake, I think that this might be the reason why we can't really see the difference between three different types of metering mode.

These are the next three photos, that I have done, using three different metering modes in my camera. I have placed the sweets, randomly one next to each other on the window sill to get a nice natural light coming through the big window. I have also created a reflection of the sweets in the window to make it look interesting and to make sure that not all of the photos are the same for this task. I have not used a tripod, therefore the composition of the photos aren't exactly the same and maybe this is why you can not really see the different regarding the metering modes between them. I have used the rule of third in this photo to help me to compose the photo better.

These are my next three photos, done in three different types of metering modes. When you enlarge the photo you can see a small difference between the three of them. I think the spot metering mode worked best for me as I could only concentrate on the main subject and it also have me that extra depth of field, which I think looks really good in food photography. In this photo I have used natural light coming from a big window behind me, that's why I have also gained a small reflection in front of the wafle. I have decided to do an eye level angle on this photo, and make sure it's in center of the photo.
Light box

I have also took some photos on light box. I have places the sweets on the light box and set the camera up to take a photo. I haven't set this camera up properly because as we can see, I have gained a silhouette and I didn't want that, but by doing this i can clearly see on this photo the difference between three different types of metering mode. First one which is spot metering worked the best out of them three just like most of the photos in my natural light photo shoot. The other two, didn't work as well because of the orange light that I got on the photos.
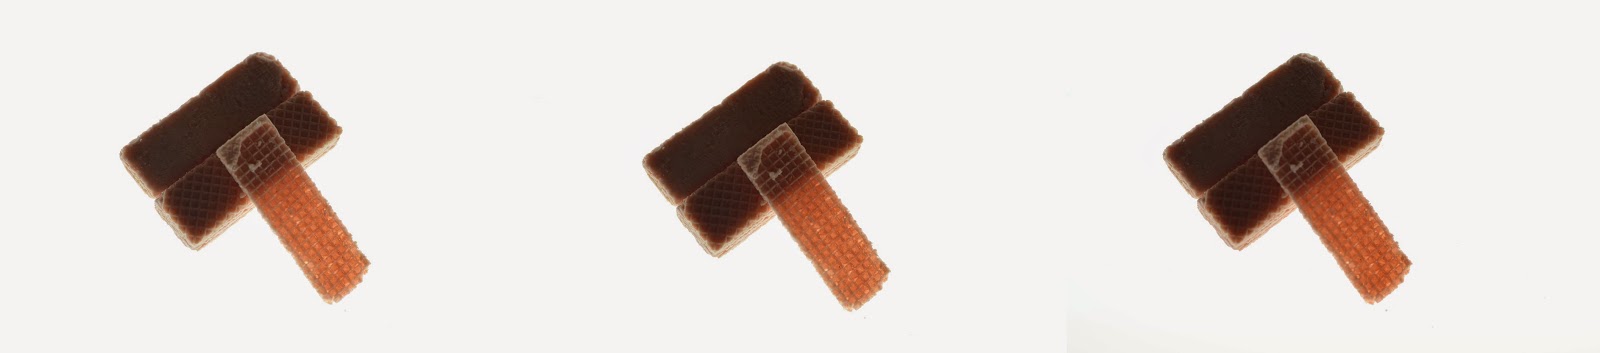
This is another selection of my three photos on a light box. This time I have picked waffles not sweets, I have taken only one layer of the waffle to show the texture, because I really liked how the light was shining through the waffle showing the lines (texture). By learning from the mistake while taking the previous photo I have changed the settings and in this I wasn't able to see the difference between three different metering modes but if I was to only pick one for this photo I would pick spot metering mode because it works the best on all of the previous photos that I have taken while experimenting with metering modes.

These three photos, have also been taken on a light box and I have also used three different types of metering mode. I haven't used a tripod, therefore they're not exactly be the same in term of the composition. By taking last two photos, I have decided to set the camera up and then continue by experimenting with the metering modes. This is still a little nit to dark, but we can see the sweets as well as the difference. I like the metering spot best, as it gives me a nice depth of field and the settings are right because the sweets which are in the middle are light and we can clearly see them.

These three photos of sweets have also been done on light box, but I have also put a yellow transparent paper. In this photo we can see the difference between the metering modes and we can also see that the colours change a little bit, I'm still not sure if it's because of the metering modes with the transparent yellow paper or if it's anything else. If I was going to have to pick one out of these three I would pick the matrix metering mode, because the colours haven't really change and I think it worked the best out of the three.
Night time

This is my first night time photo. I have used grapes, sultanas and two props which are candle and a flower. I have decided to use the same colour of a candle and a flower as grapes to make a harmonising coloured photo. I haven't used any artificial lights like lamps, I have only used candles. I have used one candle, which is in the photo and there was about three or four other small candles on the sides, outside the frame of this photo. I have carefully composed the subjects and set the camera up to a high aperture and long timing to make sure there will be enough light and the photo will not be dark. I have also used my 50mm lens. I have also used tripod. I took this photos in three different metering modes. You can see the difference on the wall, in the background. I think that the spot metering mode worked best in these photos. The shadow coming from the candle which is out of the frame is not as strong as in the other two photos with different metering modes, because the spot metering mode only concentrated the camera on the subject which is in the middle of the frame.

This is another selection of three photos, all done in different metering modes. I have used a two candles and half of a kiwi, all placed on a white table against white wall. I have decided to only light one candle so that I don't get too much light. There was few candles out side of the frame like in my first photo. The metering modes are not very clear in these photos, there's not much difference except the shadows on the background wall again. I have simply composed all three subjects in a middle of a frame of the photo, used tripod to take this photo at an eye level angle.

In this photo I have placed two fruits in the middle of the frame, I have picked two contrasting colours of the fruits because in most of my photos I have used harmonising colours. I have also decided to add some props, but in this photo I think I have might used too many and the fruits don't really stand out from the photo, even thought they're on a first plan of the photo. I take taken these three photos all in three different metering modes and ones again I can only see the difference in the shadow on a wall in the background. and out of these photos I would ones again use a spot metering mode because of the colours and the fact that the camera concentrated on the main subjects.

This photo has also been taking in three different metering modes. I have only used one fruit this time and some decorations like candles, petals etc. I have composed the candles in the middle and moved the fruit a little bit to the right instead of putting it in the middle like I have done in most of my photos. I cannot really see the difference between the three metering modes in these photos.
These are my contact sheets from technical Wednesday, day one - metering mode:


While doing these free small food photo shoots, I have learnt new very important thing, which was metering mode. I didn't know what they were before, but after practicing I think that I will be able to use them now and pick the relevant one to the photos that I am taking. These task also gave me an inspiration, after trying out three different types of lightning, which were day light, light box and night time and in this case I have used candles in stead of lamps or any other artificial light. I have really enjoyed taking photos in day light, because the quality of the photos were really good, I could play around with the reflections from the window etc. I have learnt how to take photos on a light box, as this was my first time on experimenting with light box photography. I was able to try out doing some silhouettes as well as some close up's and just normal photos. Light box really helped me to understand the difference between three different types of metering modes on my camera because they were really clear to see on most of the photos from light box. Out of them all, I have mostly enjoyed taking photos at night time. I have used quite a lot of props and not enough fruits which might have ruined some of my photos, but I have learnt from this mistake and now I will make sure not to do it again. I have also experimented with high aperture and fast timing to make sure that everything is in focus, because by using 50 mm lens I wasn't able to get, for example, full fruit in focus even though I was using tripod and automatic focus in most of my photos.


